Today is New Year's Eve and that means eating out and consuming alcohol. But this year I am going to change that.
Sometimes you can't escape eating out when you are with friends and family, but that doesn't mean you can't still make healthy choices! Make sure when eating out, you pick something on the menu with some colour (fruits and vegetables). When everything on your plate is one colour of beige, that is a sign that your meal is lacking nutrients. The more colours you have on your plate, the healthier it will be. Think red, yellow, orange, and especially green.
This morning I continued my exercise regimen with yoga. I used Jillian Michael's Yoga Meltdown DVD and tried level 2. This video is a great all over body workout. I feel a little bit stronger now! Because I feel great after my workout, I am more likely to eat healthier. My body is now craving the nutrients it needs. Therefore, I will be much more aware of what I eat tonight.
As for the alcohol, I have decided to drive tonight so that I am forced to keep myself away from the drinks. Many alcoholic beverages such as beer have an extremely high calorie count and should really be taken out of your diet if you're striving for a healthier lifestyle. I may have a glass of champagne at midnight, but that's it!
Have a great night and stay safe!
Monday, December 31, 2012

Sunday, December 30, 2012
1 Week Exercise Challenge! Sunday
Now that the holidays are almost over, it's time to get back into a routine and get rid of that turkey weight. What's the best way to do that? Exercise of course!
I woke up today feeling horrible and not wanting to do much of anything but I pushed myself towards my favourite exercise DVD Killer Buns and Thighs by Jillian Michaels. If you are not in the mood to work out I suggest just putting an exercise DVD on and turning it up loud enough so you can hear it from almost any room in your house. This always works for me. If you can hear it you will most likely start to feel guilty and give in.
After working my butt off for a good half-hour, I felt so much better! It has inspired me to do a 1 week fitness challenge and I want you to join me!
I have started on a Sunday because for me, that is the first day of the week and it is much easier to track your progress if you start at the beginning of the week than in the middle.
It is important that you have at least one goal that you want to achieve before the end of the week (Saturday). If you do not have a goal then there isn't any point in doing this challenge, right? Here are my goals:
1. Able to do 20 full push ups by Saturday
2. Have my legs, glutes, and arms noticeably more toned by Saturday
3. Feel more energized by Saturday
Today I worked on level 2 of Killer Buns and Thighs and it was the first time I got through the whole workout! I even had enough energy to try a few push ups.
Start the challenge today and push yourself to achieve your goals. It will be mentally and physically exhausting the first couple days, but the object of the game is to feel much more energized by the end of the week and hopefully I will be able to continue a routine afterwards!
Good luck and have fun with it!
Thursday, December 13, 2012
Does it Work: Oreo Stuffed Chocolate Chip Cookies

Yes, they work!
I recently tried this recipe for Oreo Stuffed Chocolate Chip Cookies . I was a bit skeptical, but they turned out great! I believe the original recipe uses Double Stuffed Oreos, but I could't find any at the store. Regular Oreos are just as good and still make these cookies extremely filling. You won't need more than 1! Happy Baking:)
Tuesday, December 11, 2012
How to Wrap Gifts Without Using Bags!


I had three gifts for someone that were different sizes and wanted to wrap them in some way that looked beautiful and more meaningful than shoving them all in a bag. This was the end result. It looks incredibly time consuming, but fortunately it's not! It's actually quite simple.
Decorative boxes from Homesense are actually affordable and they make any gift look like a million bucks!
The black box on the bottom of the pyramid of gifts, luckily came with the gift inside. The box in the middle was only about $4.99 from Homsense. I saved some even more money by wrapping the gift on the very top with beautiful green wrapping paper that picked up on accents in the box in the middle.
The whole thing was then tied together with a gold christmas ribbon for practical reasons and visual interest.
Even if your gifts are relatively the same size, or an awkward shape, you can use this technique to wrap them.
For gifts of the same size, find one box that fits them perfectly. Next find a box that is slightly bigger and stuff tissue paper inside the box so that the gift doesn't move around and fits snug. Lastly, find one more box that is slightly bigger than the middle box and repeat with the tissue paper. You can keep repeating these steps if you have more than three gifts. Finish with the ribbon. Your gifts will look beautiful and more interesting than having them all wrapped the same size. You can use these steps with awkward shaped gifts as well.
Wednesday, November 14, 2012
How to Achieve a Marble Cake Look!
I tried this recipe today from Anna Olson's Back to Baking cook book and it was pretty good! It was my first time making a marbled dessert and as you can see it turned out quite well.
*You can do this to any simple vanilla cake mix to make it more fun! Just split your cake mix in half and add melted semi-sweet chocolate to one half.

To achieve a marbled look, you first dollop the chocolate and vanilla batter alternatively into the loaf pan. Then you use a paring knife to carefully make swirls in the batter. This is done by dragging the knife around in various directions a few times.

And there you have it, a marble cake!
*You can do this to any simple vanilla cake mix to make it more fun! Just split your cake mix in half and add melted semi-sweet chocolate to one half.

To achieve a marbled look, you first dollop the chocolate and vanilla batter alternatively into the loaf pan. Then you use a paring knife to carefully make swirls in the batter. This is done by dragging the knife around in various directions a few times.
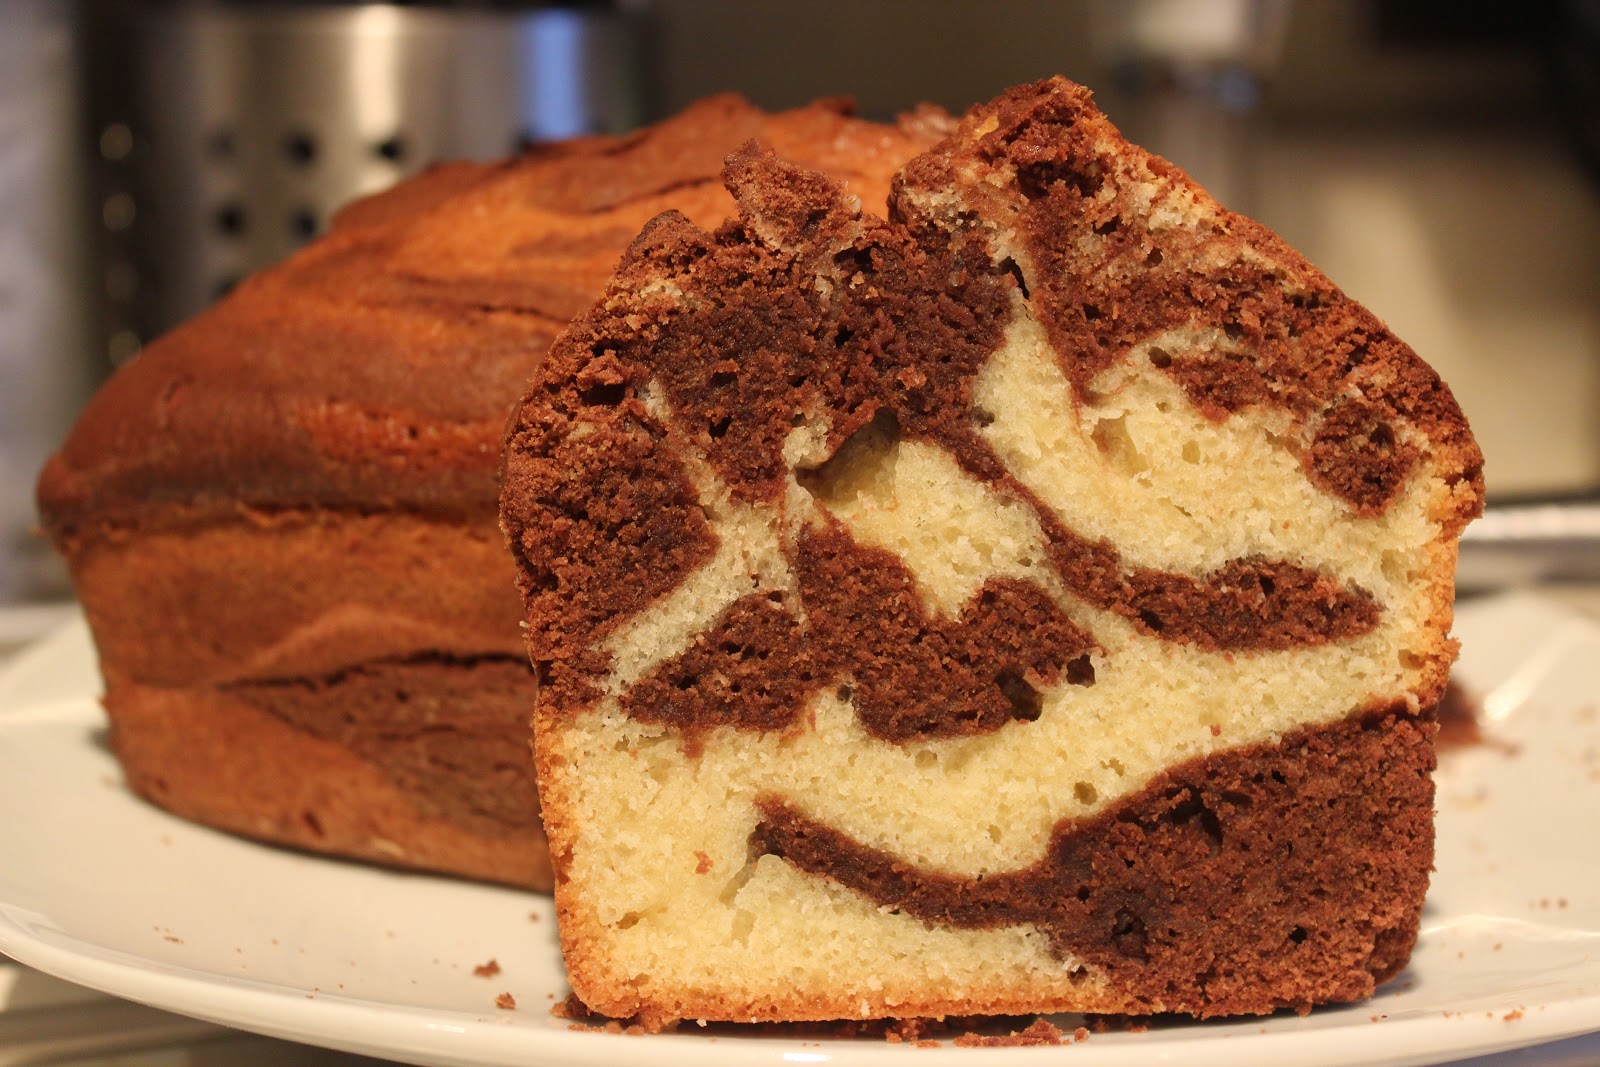
And there you have it, a marble cake!
Monday, November 12, 2012
Christmas Presents Centerpiece!

Try this fun and inexpensive craft for your dinning table! Most of the materials were found at the dollar store. You can do this with any colour scheme you wish, but I love using red and gold because it makes the house feel warm and cozy!

*Find 3 sets of boxes that are 3 different sizes. They are pretty hard to find so I had to fold up my own out of cardboard.
*Wrap the bottom and top box in one colour and the middle box in another. Do the same for the other two sets. Make sure the three sets match!
*To finish, wrap each set of 3 up together with a bow.

*I found these great gem stickers at the dollar store and added them to the very bottom of each of the stacks of 3.

*I then placed the present bundles on three candelabras at different heights for visual interest.
*I put the candelabras on a beautiful silver tray I found. It's a great opportunity to showcase your antique silverware. If you have it, flaunt it!
*I also added plastic diamonds, gold balls and pinecones to fill in the empty space on the tray. I found these items at the dollar store of course!

*I found a matching table runner to pull it all together.
And there you have it, a beautiful holiday centerpiece for you dinning table!
Wednesday, November 7, 2012
Beautiful Christmas Centerpiece! (DIY)

My favourite store to shop for decorations is Dollarama! You can get so much for so little! I used to think they only sold junk but in reality, they sell many of the same things you find in expensive craft stores but for much less. Who doesn't want to save money?
Everything you see in the picture above was bought at Dollarama except the large cream candle and the silver platter. I found the platter in my basement and shined it up a little. It looks beautiful now!
What You'll Need For This Project:
- A platter of some kind
- Pinecones
- Balls of yarn or sticks
- Bells
- A few candles
- A few small statues (I used deer)
- Plastic jewels (I have them on the bottom so you can't really see them in the picture)
These are the objects I used to create an elegant/rustic theme. You can incorporate or substitute anything you you like! These are just guidelines.
This craft literally took me about 5 minutes. There is no gluing or tedious work involved, just arrange any objects you bought or gathered from your yard on a platter for an easy, beautiful centerpiece for the holidays!
Subscribe to:
Posts (Atom)